Fermenting cabbage to make homemade sauerkraut is a simple and rewarding process, as it yields a healthy, probiotic-rich dish that can enhance your digestive health and add a flavorful, tangy punch to your meals. Here’s a quick beginner’s guide for everything you’ll need, with step-by-step instructions, complete with tips to help you get started to fermenting your first batch of sauerkraut. It really is amazingly simple to make your own homemade sauerkraut.
What You Need:
- Fresh cabbage: 1 medium head (about 2-3 pounds)
- Non-iodized salt: 1.5 tablespoons, depending on your water usage (see Step 2: Salt and Mix)
- Flavorings (Optional, But Highly Encouraged)
- Equipment:
- A large non-metallic mixing bowl,
- a sharp kitchen knife,
- a large, wide-mouth jar,
- a weight to ensure the veggies are held under liquid, and
- an airlock.
Homemade Sauerkraut Equipment
Large non-metallic mixing bowl
Any kind of non-metallic mixing bowl will work. You want a non-metallic bowl because metal bowls can react with the acids produced when fermenting cabbage and other vegetables. This can affect the flavor, color and fermentation process. To be safe, I would simply use a glass bowl.
A large, sharp kitchen knife
You want a large, sharp kitchen knife as an entire head of cabbage can prove to be quite awkward sometimes. Cutting an entire cabbage in half should be done with your standard 8″ chef’s knife, sharpened with a honing stick before making your initial incisions.
A large, wide-mouth jar
I use Mason jars because of the wide-mouth and versatility of options for their lids. You can use any jar that has a wide-mouth. Batches of smaller jars will ensure a faster fermentation process, resulting in faster homemade sauerkraut goodness. It may require more equipment, but you can experiment with different recipes at once, as well.
A weight to ensure the cabbage is held under liquid
There are pickling weights, which are glass weights that keep the vegetables under the surface of the water. If you don’t use a glass weight, you could use another smaller jar to take up the space and ensure the veggies don’t come up for air. The glass weights on Amazon, are pretty cheap and non-reactive, so, there’s really no point in trying to find a substitute that could put your fermentation at risk.
An airlock
An airlock ensures that gasses can escape. If you used a canning lid, you would need to “burp” the jars to ensure that the built up gases are able to escape. Otherwise, you could have a mess in your pantry, as glass tends to shatter under pressure. There are a ton of cheap options for this one, but I recently bought these ones on Amazon, and I’m pretty happy with them.
Homemade Sauerkraut Directions
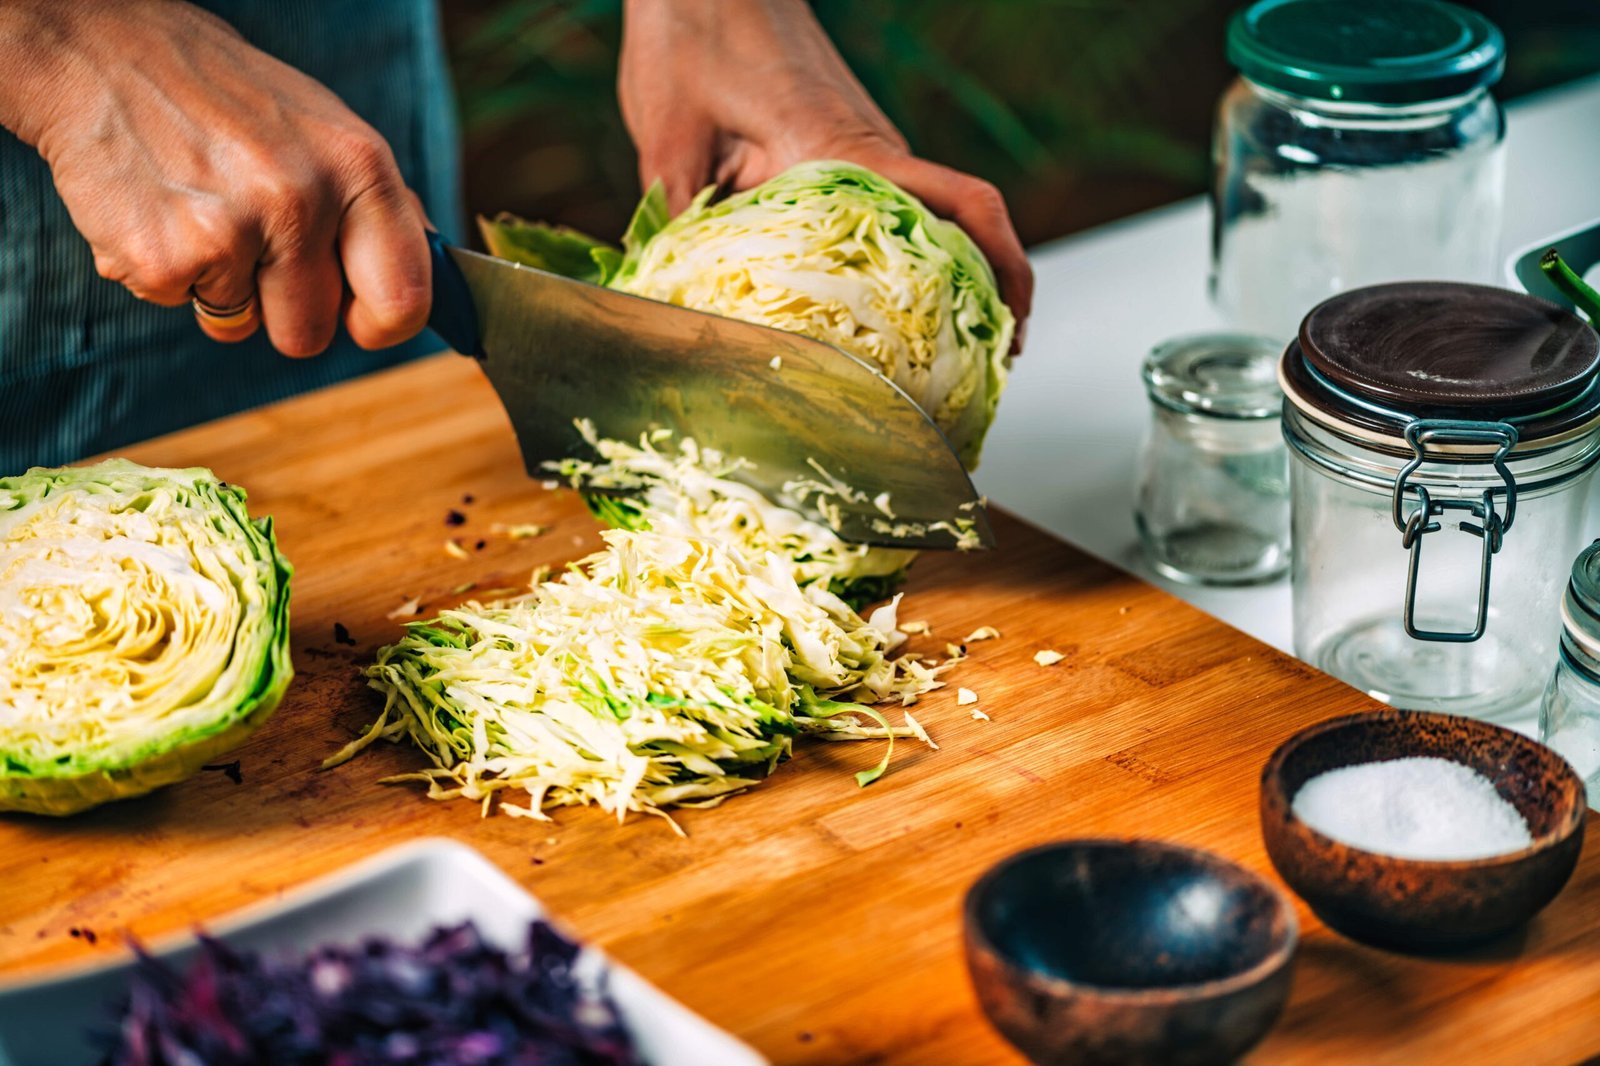
Step 1: Prepare the Cabbage
Start by removing the outer leaves of the cabbage. Save a couple of the cleaner leaves for later use. Slice the cabbage into quarters and remove the core. Then, finely shred the cabbage using a knife. The thinner the shreds, the easier and quicker your fermentation process will be.
Step 2: Salt and Mix
Place the shredded cabbage in a large mixing bowl and sprinkle the sea salt over it. Sea salt is preferred because it is easily dissolved and it has a good nutrient and mineral profile. You can use many other salts though, such as rock salt and pink Himalayan salt. I use fine pink Himalayan salt. Just make sure your salt is NOT iodized, which inhibits the growth of good bacteria.
Use your hands to massage the salt into the cabbage for about 5 to 10 minutes. This process breaks down the cabbage’s cell walls, releasing water. You’ll notice the cabbage becoming watery and limp; this is exactly what you want.
Step 3: Add Flavorings (Optional)
Once the cabbage has released enough water, you can add any combination of flavorings you’d like. Caraway seeds, for example, are a classic flavor enhancer or garlic for a bit of a kick. Try and experiment with this portion, different spices, herbs and vegetables will provide different flavor profiles. Mix these additional ingredients into the cabbage thoroughly.
Step 4: Pack the Jar
Transfer the cabbage mixture into a clean wide-mouth jar, a few spoonfuls at a time, while pressing down firmly with your fist or a tamper after each addition. This packing eliminates air bubbles and submerges the cabbage under its liquid, which is crucial for anaerobic fermentation.
Step 5: Weigh Down the Cabbage
Use a glass pickle weight, or you can place one of the larger reserved cabbage leaves over the surface of the shredded cabbage. Tuck it down the sides of the jar to help keep the shredded pieces submerged. This will help keep everything submerged, but I recommend a glass pickle weight for ease of use and to ensure consistency.
Step 6: Cover and Store
Use an airlock or other device which allows gasses to escape. Place the jar in a cool, dark place like a pantry with a room temperature (around 65-70°F or 18-21°C) is ideal for fermentation.
Step 7: Fermentation
Let the cabbage ferment for at least 3 days and up to 2 weeks, checking it every day to ensure the cabbage remains submerged. You may notice bubbles during this process, which is a good sign—it means your homemade sauerkraut is in progress. Taste it at intervals to find the flavor and texture that you like.
Step 8: Storage
Once the cabbage is fermented to your liking, remove the smaller jar, replace the cloth with a tight lid, and store your homemade sauerkraut in the refrigerator. It will keep for several months chilled and will continue to ferment slowly, developing flavor over time.
Tips for Success:
- Keep Everything Clean: Before you begin, make sure all your tools and containers are thoroughly washed to avoid introducing any harmful bacteria.
- Keep It Submerged: The key to successful fermentation is keeping all the cabbage submerged under its liquid to prevent mold and bacteria growth. I like to skim the top from time to time.
- Be Patient: The longer you let your cabbage ferment, the more pronounced its flavor will be. If it’s your first time, try tasting your sauerkraut at different stages to find your preference.
Fermenting cabbage at home is not only a great way to produce delicious food, but it also offers health benefits, including improved digestion and enhanced immune function. Enjoy your homemade sauerkraut on its own, as a topping, or an added ingredient in your favorite meal.